
DIY Acoustic Timber Fence
Acoustic Fences are often used to help block noise from nearby roads and factories. Although they are not the perfect solution to screen noise, they will help people enjoy their garden. Because noise flows like air and water, noise will of course, flow over the top of any fencing installed so it is best to have them as high as possible for maximum benefits.
We are often asked how to construct a timber fence that will help block noise such as traffic noise from near a road. This will be quite simple to do by anyone used to working with basic carpentry tools and will enable them to construct a fence using M20AD a recycled soundproofing material with a sound insulation value in excess of 30dB. Listed below are some of the tools likely to be required to construct an effective acoustic fence.
Tape Measure
Crosscut Saw
Hammer
Sharp Stanley type knife
Spirit Level

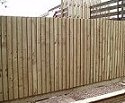
The acoustic fence would be of close board type and quite simply erected using normal 4 x 4 inch (100 x 100mm) fence posts fixed into either a concrete base or a dry steel fence post spike driven securely into the ground. Whichever option is preferred, the base of the fence posts should be well soaked with a wood preservative before fixing. If the fence is to be over 1.8m high, thicker wooden posts or concrete posts would give greater stability.
Installation instructions
Note! It is advisable to use only timber panels that have been treated with a wood preserver.
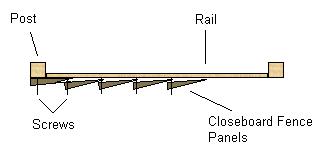
1. First install the fence posts suitably spaced apart to suit and to give stability.
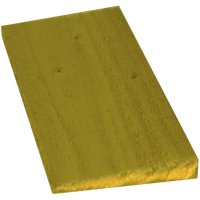
2. Once the posts are stable, fix a 7 x 1 inch rail sometimes referred to as a ‘Gravel Board’ to the bottom of the fence posts ensuring they are level and on the outside of the posts.
3. Fix more rails one near the top of the posts, another just above the first rail fitted near the bottom and more if required between to give support in the middle and this time all of them flush with the outside surface of the posts.
4. Now you can fix feather edged boards to create a shiplap style fence as shown. Simply sit each panel on top of the outside bottom rail then fix with screws to the other rails so the panels are overlapping each other. To start, fit the first panel ensuring it is perfectly upright with the aid of a spirit level
5. More panels can now be added ensuring each one overlaps the previous one by at least 25mm and as shown below.
6. A suitably sized small block can be used to ensure the overlaps remain constant and to get the spacing right.
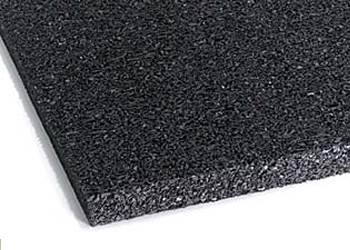 7. Now the first side of the fence has been completed, 20mm recycled M20AD can be screwed to the side between the posts. Be sure to cover all of the area where the reverse side of the shiplap fencing is visible.
8. Once the M20AD soundproofing panel for fencing has been installed, it can be enclosed and hidden using more feathered edge shiplap fence panels installed as detailed for the side already completed.
9. When both sides of the fence have had shiplap fence panels installed and the M20AD soundproofing pad sandwiched in the middle, all that remains is to cap the fencing with a timber cap that will cover both sides of the fence in one. This will help protect the fencing from the weather and will preserve its life.
10. Your soundproof fence is now complete so enjoy.
Written by Stephen Young
© Sound Service (Oxford) Ltd. 2009

