
Quietfloor PLUS Installation Guide
Download this as a PDF file here or download our new simple pictorial install guide here
Preparation
The floor to be treated should be examined and any loose floorboards should be firmly secured using
screw fixings so as to reduce the risk of squeaking when walked upon. The joints of the floorboard
should ideally be sealed using our Acoustic Sealant followed by our 2mm thick mineral loaded SBM5
Soundproofing Mat butt joined.
No mechanical fixings required for this but for best results, the SBM5
should be glued using our spray contact adhesive sta’stuk. Our jointing tape can be used to seal the
joints before installation of any further treatment if required.
Installation with carpet
Quietfloor PLUS can be laid using traditional carpet grippers. First nail down our perimeter strips around the edges of the room suitably spaced away from the walls to allow the edges of the carpet to be tucked into when fitting. Nail carpet gripper rods onto the top of the perimeter strips, ensuring they are at the correct height to take the carpet.
Tightly butt the Quietfloor PLUS panels against the perimeter detail and loose lay or glue
across the rest of the floor ensuring the joints are tightly butted together. Secure the joints
with our Jointing Tape to ensure they remain tightly butted. Loose joints will allow noise leakage
and will reduce the effectiveness of the insulation.
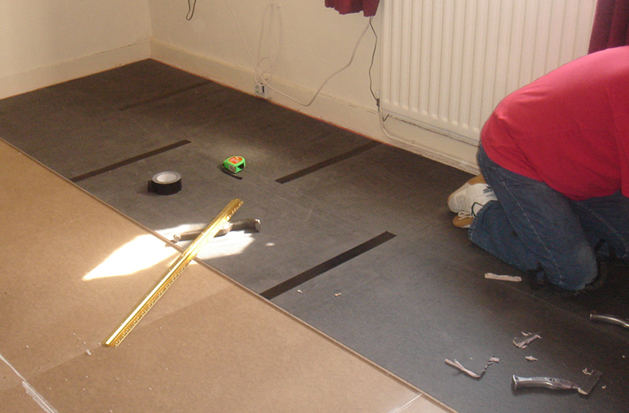
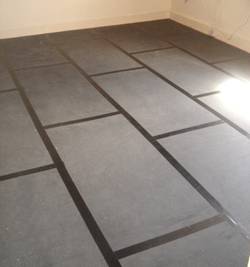
Installation under a vinyl floor
For vinyl and bonded carpet finishes, bond the Quietfloor PLUS to the sub-floor in brick-style pattern.
Use our Spray Adhesive only, glue a layer of 6mm MDF or ply to the top
of the tiles. The MDF edge detail should be a minimum of 50mm from any Quietfloor PLUS joint. An isolation
gap of 5mm should be left between the wall and the MDF then fill the isolation gap with our
flexible Acoustic Sealant.
MDF or ply boards should be bonded to each other using a good quality wood adhesive.
Installation under a T&G floor
If a t&g floor of at least 15mm depth is preferred instead of carpet, the QuietFloor PLUS must be installed across the entire surface of the floor as usual with the joints taped. Edging strips will not be required and should not be used. Install the t&g flooring directly on top of the QuietFloor PLUS in accordance with the instructions supplied with the flooring but with the joints securely glued. Under no circumstances should mechanical fixings be used. An isolation gap of 5mm should be left between the wall and the t&g floor then fill the isolation gap with our flexible Acoustic Sealant.
installation on stairs
On stairs, first cut out Quietfloor PLUS panels to the right size then bond the Quietfloor PLUS to the tread and risers of the stairs using our Sta-Put Spray Adhesive. Nail perimeter edging strips to the tread or riser and where a nosing detail is required, install a section of MDF the same thickness as the Quietfloor PLUS
Download our new simple pictorial install guide here
FOR FURTHER ADVISE AND HELP PLEASE CALL OUR TECHNICAL TEAM ON 0845 363 7131

